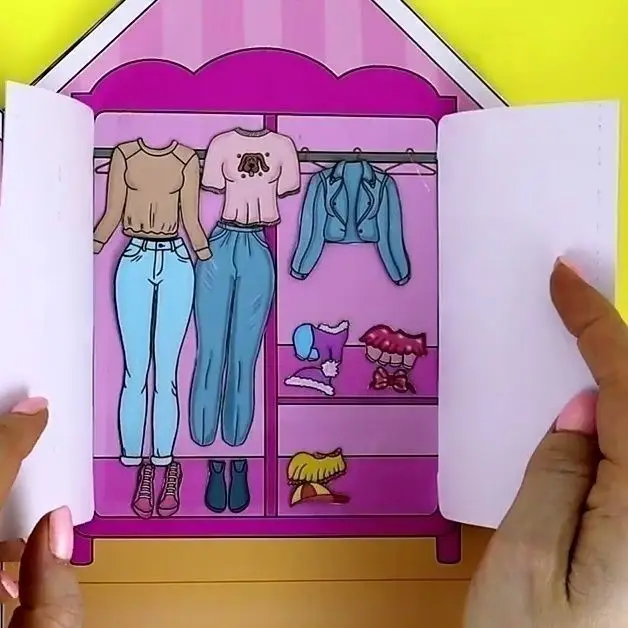
Introduction to Paper Doll Houses
Paper doll houses spark the joy of creativity. They take us back to childhood. Simple yet charming, these miniature homes offer a world of fun. Crafting a paper doll house is rewarding. It requires time, patience, and imagination. This guide is your key to making a katemade paper doll house kate made. We’ll explore the materials and steps needed. Keep in mind, personal touches make your creation unique. Read on to begin your delightful craft journey.
Essential Materials for Your Kate Made Paper Doll House
Before diving into the creation of your own kate made paper doll house, it’s important to gather all necessary materials. Ensuring you have everything on hand will make the process smoother and more enjoyable. Start with a list and tick off each item as you acquire them. Here are the essentials you’ll need:
- Sturdy Cardboard: The foundation of your dollhouse. Choose a thickness that can hold up the structure but is still easy to cut.
- Craft Knife and Scissors: For precise cutting. A craft knife is ideal for detailed work, while scissors can handle larger pieces.
- Ruler and Cutting Mat: To measure and protect surfaces during cutting.
- Glue and Tape: A strong adhesive to piece together your dollhouse. Double-sided tape can be handy for attaching decorative elements.
- Pencil and Eraser: For sketching out designs and correcting any mistakes.
- Decorative Paper or Paint: To bring color and texture to your kate made creation. Choose patterns and palettes that match your vision.
- Embellishments: Think stickers, fabric scraps, or anything that adds character.
- Patience and Creativity: Perhaps the most critical materials. Take your time and let your imagination run wild.
Remember, quality materials lead to a more durable and appealing paper doll house. Investing a little more in good supplies can go a long way in bringing your katemade paper doll house kate made to life.
Step-by-Step Guide to Creating Your Paper Doll House
Now that you have your materials, let’s dive into the steps to create your captivating kate made paper doll house. Breaking down the process into manageable steps will help you stay organized and enjoy the crafting experience. Here’s your step-by-step guide.
- Design Your Layout: Begin by sketching the layout of your dollhouse. Decide how many rooms you want and their placement. Make sure doors and windows are where you want them.
- Cut the Cardboard: With your craft knife and ruler, carefully cut out the cardboard pieces according to your design. Use scissors for simpler, straight cuts.
- Assemble the Frame: Start erecting the walls and floors. Use glue for a strong bond, and hold each piece until it’s secure. Be patient as you work.
- Add Outer Details: Attach windows and doors cut from cardboard. Use double-sided tape for a clean look. Consider the roof design and attach it.
- Decorate the Interior: Paint or apply your chosen decorative paper inside the rooms. Work slowly to align patterns and avoid air bubbles.
- Personalize Each Room: Make it unique with embellishments that reflect the personality of your paper doll house. Stickers, fabric scraps, and handmade items work well.
- Final Touches: Look over your dollhouse. Add any last-minute details or adjustments. Make sure every part is secure and neatly finished.
Congratulations! Your kate made paper doll house is now complete. Take pride in your dedicated effort. The next steps will be to add personal touches and decorations to enhance its charm.
Tips for Personalizing Your Paper Doll House Designs
Personalizing your Kate Made paper doll house adds a unique touch to your craft. Here are some tips to make your paper doll house distinctly yours:
- Choose a Theme: Select a theme that you love. It can be anything from a fairy tale to modern chic. Let this theme guide your color schemes and decor choices.
- Mix and Match Patterns: Don’t hesitate to use different patterns together. Stripes with polka dots or floral with geometric can add character to each room.
- Use Photos: Incorporate your own photos as miniature artworks or family pictures within the rooms. They add a personal storytelling element.
- DIY Furniture: Design your own furniture pieces from scraps of cardboard or fabric. This not only personalizes your space but also ensures a perfect match with the house’s style.
- Name Your House: Give your dollhouse a special name. It could reflect the theme, the ‘residents,’ or simply be a creative expression of your own style.
- Change Seasons: Consider creating seasonal decorations you can switch out. It keeps the dollhouse feeling fresh and in tune with the real world.
- Accessorize: Details matter. Tiny cushions, rugs, or bookshelves fill the space with life and make it more inviting.
- Lighting: If you’re feeling adventurous, add small LED lights to brighten up the rooms.
Remember, the more you infuse your creativity and personality into your Kate Made paper doll house, the more it becomes a reflection of your artistic spirit. Embrace experimentation and have fun with the process!
Creative Ideas for Decorating Your Kate Made Paper Doll House
When you reach the decorating stage, your Kate Made paper doll house begins to shine. Here, creativity knows no bounds. Explore these ideas to make your miniature home unique and delightful:
- Wall Art: Create tiny paintings or print miniature art pieces. They bring the walls to life.
- Textured Floors: Use fabric or textured paper. It adds depth to your dollhouse floors.
- Window Treatments: Craft curtains or blinds from scrap fabric. They add a cozy feel.
- Colorful Roofs: Paint or use colored paper for roof tiles. Bright colors make your doll home stand out.
- Landscape Elements: Add a touch of greenery with paper plants or a small paper garden. It creates an outdoor ambiance.
- Themed Rooms: Dedicate each room to a different theme. A beach theme or space adventure can excite the imagination.
- Miniature Library: Fill a room with tiny books made from paper. It becomes a place of miniature knowledge.
- Open Shelving: Build shelves from matchsticks or toothpicks. Use them to display little treasures.
Think outside the box and use everyday items in new ways. Simple resources like beads or buttons can become decor pieces. Combining these tips with your kate made paper doll house will ensure a charming result. Have fun and let your personal style guide you.
Incorporating Furniture and Accessories
Creating furniture and accessories is a key step in bringing your kate made paper doll house to life. Each piece you add can tell a story and enhance the overall charm of your miniature home. Here are some creative ways to incorporate furniture and accessories into your kate made creation:
- Craft Miniature Furniture: Use small boxes or card scraps to design sofas, beds, and tables. Decorate them with fabric or paint to match your house’s theme.
- Design Accessories: Create accessories like vases, books, and dishes from beads, buttons, or paper. These details add depth and realism to each room.
- Textiles for Comfort: Cut tiny pieces of cloth to make bedding, curtains, or rugs. This infuses the space with warmth and texture.
- Recycle and Reuse: Look for items you can repurpose. A bottle cap becomes a table; a matchbox turns into a dresser.
- Customize with Paint: Use a tiny brush to paint designs on your furniture. This personalizes your space and ensures a cohesive look.
- Scale is Key: Ensure that furniture and accessories match the dollhouse’s scale. This keeps the look of the house consistent and believable.
By paying attention to scale and using your creativity, you can furnish and adorn your kate made paper doll house with beautiful, bespoke pieces. These small additions make a big impact, bringing warmth and personality to your handcrafted treasure.
Interactive Features for Added Fun
To enhance the play value of your kate made paper doll house, interactive features are a fantastic addition. These features can bring your creation to life, making it not just a display item but a toy that can be engaged with. Here are some ideas for integrating interactive elements into your paper doll house:
- Doors and Windows that Open: Adding hinges to doors and windows allows them to open and close, adding a realistic touch.
- Moveable Room Dividers: Create room dividers that can slide or fold. This allows for customizable room layouts and adds variety to play.
- Elevator or Stairs: If your dollhouse has multiple levels, consider adding a simple elevator from cardboard or a staircase that dolls can ‘climb’.
- Removable Roof: A roof that can be lifted off provides easy access to the attic or upper floors, making decorating and playing even more engaging.
- Fold-Down Furniture: Design furniture that can fold down from the walls, like Murphy beds or fold-away dining tables. It saves space and is fun to use.
- Magnetic Accessories: Use small magnets in walls and on accessories so that pictures, mirrors, and shelves can be moved around.
- Reversible Decor: Create wall decorations or rugs that are reversible to quickly change the look of a room.
By incorporating these interactive features, your kate made paper doll house becomes a dynamic play area. Kids and adults alike can enjoy the added functionality, and it encourages imaginative play. With these ideas, your paper doll house will not only be a beautiful display but also an entertainment hub.
Preserving and Displaying Your Kate Made Paper Doll House
Once you’ve poured love and creativity into your kate made paper doll house, you’ll want to preserve and display it. This last step is crucial to enjoy your masterpiece for years to come. Here are some tips to help protect and show off your kate made creation.
- Keep Away from Moisture: Store your paper doll house in a dry place. Moisture can weaken the cardboard and cause colors to run.
- Avoid Direct Sunlight: To prevent fading, place your dollhouse away from windows where direct sunlight hits.
- Dust Regularly: Use a soft brush or a dry cloth to gently remove dust. This keeps your dollhouse looking fresh.
- Display on a Shelf: A high shelf is perfect for showing off your dollhouse. It keeps it out of reach from small hands or pets.
- Use a Display Case: Consider a glass or clear plastic case to protect your house from dust and damage.
- Rotate Your Houses: If you have multiple houses, rotate which one you display. This keeps interest alive and preserves them better.
- Handling with Care: When moving your paper doll house, lift it gently. Avoid grabbing delicate parts that can tear or break.
By following these recommendations, your kate made paper doll house will stand the test of time. It’s not just a craft, but a cherished keepsake that reflects personal artistry. Display it with pride, and remember the joy in every fold and cut that led to its creation.