Introduction to 1/6 BJD Dolls and Their Sizes
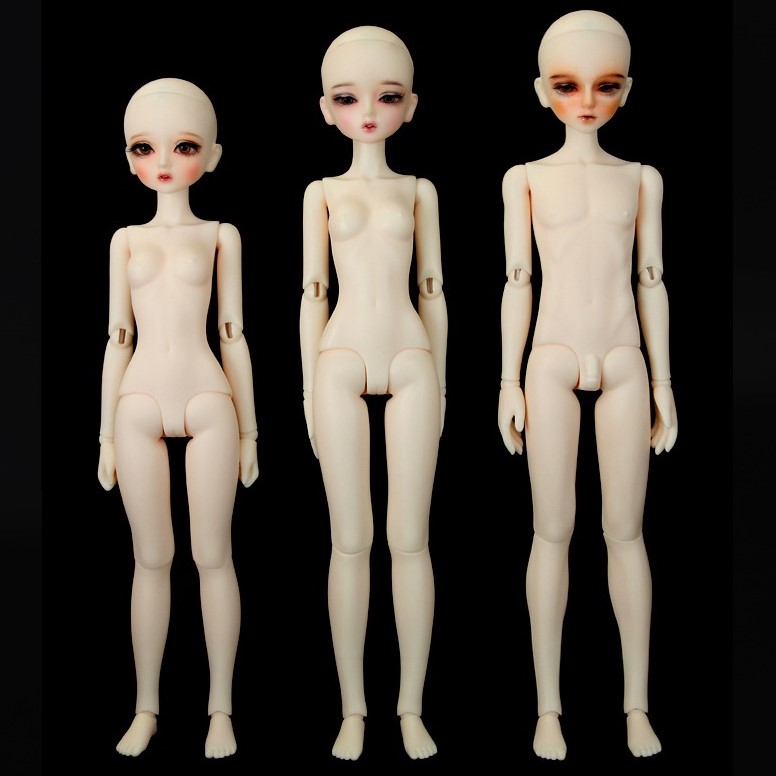
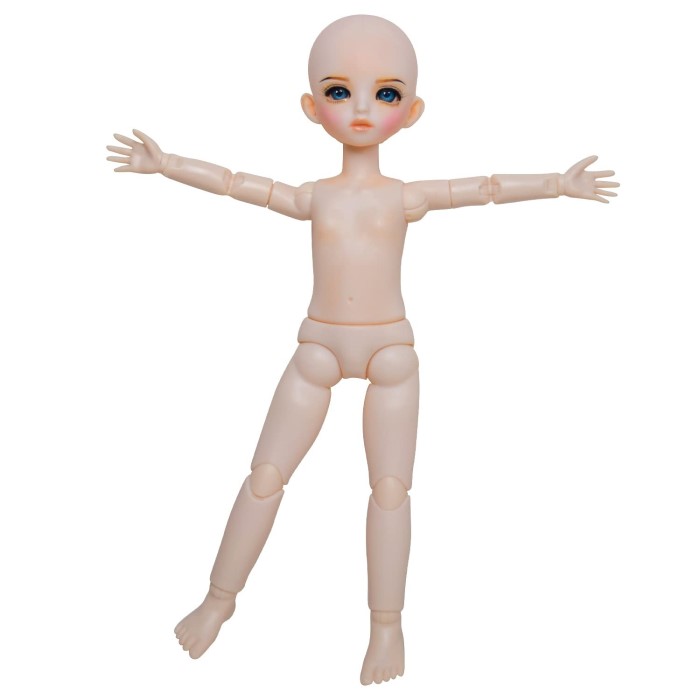
The world of 1/6 BJD dolls is enchanting and diverse. BJD stands for Ball-Jointed Doll, a type of doll notable for its articulated joints and the ability to pose in lifelike ways. The 1/6 size refers to their scale: they are one-sixth the size of an average human figure. This typically means these dolls are about 10 to 12 inches tall, providing a charming balance between playability and detail.
Owning a 1/6 BJD is not just about the doll itself; it’s about personalization. Collectors and hobbyists often enjoy customizing their dolls, from the skin tone and facial features to the very outfits they wear. This is where sewing for 1/6 BJD size becomes a valuable skill. Crafting clothing that fits these small proportions requires precision and an understanding of the unique challenges presented by their scale.
To get started, recognizing the key measurements for a 1/6 BJD is crucial. The most common measurements include the height, the circumference of the head, chest, waist, hips, and the length of the limbs. These dimensions are essential when creating patterns and clothes that fit the doll accurately.
As you delve into sewing for your 1/6 BJD, you will discover the fulfilling experience of bringing your creative vision to life. Whether it’s a fairy-tale gown or modern-day attire, the clothes you make add personality and flair to your doll’s appearance. Moreover, as you develop your sewing skills, you can create more intricate and sophisticated designs that reflect your unique style.
In the coming sections, we will explore the essential supplies, fabric choices, patterns, and techniques that will help you master the art of sewing for 1/6 bjd size dolls. With patience and practice, you’ll soon be able to craft a wardrobe as unique as your BJD itself.
Essential Sewing Supplies for BJD Outfits
Before diving into the world of creating outfits for your 1/6 BJD, it’s vital to gather the right tools. Good sewing starts with having the essential supplies on hand. Here’s a checklist for what you’ll need to begin:
- Sewing Machine: A basic machine capable of straight and zigzag stitches is enough.
- Needles: Get various sizes. Small, sharp ones work best for delicate work on tiny clothes.
- Thread: Choose quality thread in a range of colors matching your fabric choices.
- Scissors: Invest in sharp sewing scissors for clean cuts. Small embroidery scissors are also helpful.
- Pins and Pincushion: Essential for holding fabric in place as you sew.
- Measuring Tape: Use this to take accurate measurements of your doll.
- Fabric Marker: A disappearing ink marker or tailor’s chalk will be useful for marking patterns on fabric.
- Iron: Pressing fabric ensures a neat finish on garments. A small craft iron is ideal.
- Seam Ripper: Mistakes happen. A seam ripper can save the day when you need undoing stitches.
- Thimble: Protect your fingers when hand-sewing parts of the BJD’s outfits.
- Pattern Paper: To draw and adjust your own patterns for cutting the fabric.
All of these supplies combined will prepare you to tackle the intricacies of 1/6 bjd size clothes. Remember, when working at such a small scale, precision is key. Every stitch counts and the right tool makes all the difference. Next, we will look at understanding the proportions and measurements to ensure your outfits not just fit, but flatter your BJD’s form.
Understanding BJD 1/6 Scale Proportions and Measurements
When sewing for your 1/6 BJD, understanding its unique proportions is crucial. These dolls are designed with specific measurements that differ from those of humans in scale. To ensure your created outfits look just right, you need to be familiar with these key proportions.
First, measure your doll’s height. A 1/6 bjd size typically stands around 10 to 12 inches tall. Use a measuring tape to record this. Then, measure the head circumference. This will guide you when making hats or hoods. Next, note the chest, waist, and hip measurements. These are vital for creating tops, dresses, and pants that fit snugly.
Don’t forget the limbs. Measure the length and circumference of your BJD‘s arms and legs. This ensures sleeves and pants have the right length and width. Remember, accuracy is essential. Even small errors can lead to ill-fitting clothes. You want outfits that complement your doll’s aesthetics, not hinder them.
Lastly, keep a record of these measurements. It makes future sewing projects easier. With these proportions in mind, you’re ready to select fabrics and start on patterns. These notes guide you through the next steps of crafting outfits that enhance your BJD’s charm.
Choosing Fabrics Suitable for Small Scale Doll Clothing
Choosing the right fabrics is crucial for 1/6 bjd size doll clothing. The fabrics must work with the small scale and intricate details of the outfits. Here are some tips to help select the perfect materials:
- Lightweight Fabrics: Opt for lightweight and thin materials. They drape well and won’t appear bulky on the doll.
- Fine Weave: A fine weave is essential. It ensures the fabric looks in scale with the doll’s size.
- Non-Fraying: Fabrics that don’t fray easily are ideal. They are easier to work with, especially for hems and seams.
- Stretch Fabrics: Consider stretchy materials for snug-fitting clothes. They can provide flexibility in fit.
- Natural Fibers: Cotton, silk, and linen shrug off wrinkles and offer a premium look.
- Testing: Always test a small scrap. This verifies how the fabric sews and drapes on a tiny form.
Be mindful of patterns and prints. Large designs can overwhelm the doll’s small stature. Choose subtle prints or solid colors to keep the focus on the doll and its features. Experiment with different textures and materials. Each one can add character and realism to the doll’s wardrobe. With these considerations, you can begin creating beautiful, tailored clothing for your 1/6 bjd size dolls.
Basic Sewing Patterns for 1/6 Size BJD Clothing
Embarking on crafting clothes for 1/6 BJD dolls starts with simple patterns. Basic patterns allow beginners to grasp the fundamentals and expand from there. Let’s explore essential patterns you should have in your toolkit.
- T-Shirts and Tops: Begin with a basic bodice pattern. It’s a foundation for various tops.
- Skirts: A simple A-line or gathered skirt pattern has few pieces and it’s easy to sew.
- Pants: Basic straight or slim cut pants are starter-friendly. They introduce sewing seams and hemming.
- Dresses: Combine a bodice with a skirt pattern. It’s versatile for many styles.
- Sleeves: Learning set-in sleeves adds complexity. Start with short sleeves before moving to long.
- Accessories: Patterns for hats, scarves, and bags bring extra flair with little complexity.
For a newbie, it is wise to go slow. Practice with these simple patterns and hone your skill. With patience, your proficiency will grow, allowing you to tackle more complex designs. Each piece you create adds skill and confidence in handling your BJD’s unique 1/6 size dimensions. Keep practicing, and soon you’ll craft an entire wardrobe with ease.
Step-by-Step Guide to Creating Your First BJD Outfit
Crafting your first outfit for a 1/6 bjd size doll can be both exciting and a bit daunting. But with a clear, step-by-step process, even beginners can produce charming garments that fit their BJDs perfectly. Here’s your guide to making that first piece:
Select a Pattern
- Start with Simplicity: When embarking on your sewing journey for your BJD (Ball-Jointed Doll), it’s important to select a pattern that is manageable. Begin with basic designs, such as a classic T-shirt or a simple skirt.
- Skill Level Consideration: Evaluate your own sewing skills and confidence. Picking a pattern that aligns with your abilities will make the process enjoyable and less frustrating.
Measure Twice
- Confirm Measurements: Accuracy is key when sewing for your BJD. Take the time to measure your doll carefully to ensure that the garment will fit perfectly.
- Pattern Compatibility: Cross-reference these measurements with the dimensions specified in your chosen pattern. Ensure that the pattern accommodates your doll’s unique proportions for an ideal fit.
Choose Your Fabric
- Fabric Selection: Opt for lightweight, fine-weave fabrics that drape well and don’t add unnecessary bulk to the outfit. Ideal materials include cotton, linen, or lightweight knits.
- Visual Appeal: Think strategically about how the chosen fabric will contribute to the garment’s overall aesthetic. The right fabric can significantly affect the final look of the outfit.
Cut Out Fabric Pieces
- Prepare Your Workspace: Lay your selected fabric flat on a clean surface, ensuring there are no wrinkles or creases. This setup is essential for accurate cutting.
- Precision Cutting: Use your chosen pattern as a guide and meticulously cut out each fabric piece. Ensuring that every cut is accurate will lead to a more professional finish.
Mark Seam Allowances
- Use Fabric Markers: Before you start sewing, utilize fabric markers or chalk to mark the seam allowances on your fabric pieces as indicated by the pattern.
- Ensuring Precision: Marking these seam lines will lead to greater accuracy in sewing, helping prevent mistakes and ensuring that the pieces fit together seamlessly.
Pin Pieces Together
- Pinning Technique: Follow the pattern instructions to pin the fabric pieces together before sewing. Use enough pins to hold the pieces in place effectively during the stitching process.
- Stability for Sewing: Pinning secures the fabric and helps maintain alignment, reducing the chance of fabric sliding while you work.
Sewing Time
- Start Sewing: Begin your sewing project by stitching along the marked seams as indicated by the pattern. Follow the sequence to create the garment correctly.
- Stitch Types: Utilize straight stitches for most seams or zigzag stitches for added flexibility, especially on edges and curves.
Press the Seams
- Ironing the Seams: Once you’ve finished sewing the seams, it’s time to press them flat with an iron. This step is crucial for creating a polished appearance.
- Craft Iron Recommendation: A small craft iron is preferable for its precision, allowing you to reach smaller areas and detail effectively.
Finish Edges
- Preventing Fraying: To keep your garment looking neat and professional, finish the raw edges of your fabric. This can be done using a zigzag stitch, pinking shears, or a serger.
- Longevity of the Outfit: Properly finished edges prevent fraying and increase the durability of the clothing.
Final Fittings
- Try It On: After completing the sewing project, dress your BJD in the new outfit to check the fit. This is an important step, as it allows you to see how well the clothing works on the actual doll.
- Making Adjustments: Pay attention to areas that may need alterations. Don’t hesitate to make minor adjustments to ensure a proper fit.
Add Fastenings
- Choosing Fastenings: Decide on closures such as snaps, Velcro, or buttons. Ensure that whatever fastenings you choose are small enough to scale with the outfit yet functional enough for easy dressing.
- Sewing Them In: Carefully sew the fasteners onto the garment, ensuring they are secure and properly aligned to facilitate easy opening and closing.
Detail Work
- Finishing Touches: Add embellishments such as buttons, lace, or decals to give the outfit personality. Small details can make a significant difference in the overall appeal.
- Character Addition: Think creatively about how these details enhance the character of your outfit, adding depth and style.
Celebrate Your Creation
- Put It All Together: Once the garment is complete and detailed, dress your BJD in the finished outfit. Enjoy the moment of seeing your creation come to life.
- Admire Your Work: Take a step back and celebrate the achievement. You’ve just completed your first BJD garment, showcasing your creative skills and effort!
By following these steps carefully, making your first 1/6 bjd size outfit should be a breeze. Remember, practice makes perfect. With each garment you make, your skills will improve, and soon you’ll be crafting more complex and detailed outfits. Happy sewing!
Tips and Tricks for Detailing and Customization
Detailing and customization are what turn a simple BJD outfit into a standout piece. Here are practical tips to help elevate your 1/6 bjd size clothing.
- Choose the Right Scale: Use tiny buttons and small ribbons. They should match the doll’s scale.
- Embroidery: Add embroidery for a personal touch. Use fine thread for delicate designs.
- Layering: Combine different fabrics and textures. It adds depth to the clothing.
- Color Variation: Mix and match colors. Contrast lining can surprise and delight.
- Painting: Try fabric paints for unique patterns or effects. Small stencils can be helpful.
- Beadwork: Apply small beads for a bit of glamour. Use a fine needle and thread.
- Patches and Appliques: Attach small patches or appliques to show personality.
These tips will give your 1/6 bjd size clothing an exclusive look. Focus on precision and keep trying new ideas. Your doll’s wardrobe will soon have a custom, bespoke feel unique to your style.
Caring for and Maintaining BJD Clothing
Caring for 1/6 BJD size clothing is simple yet essential for longevity. Here are steps to follow:
- Gentle Washing: Hand wash outfits in lukewarm water with mild detergent. Avoid machine washing.
- Air Dry: Lay the clothes flat or hang them to dry. Don’t use high heat or a tumble dryer.
- Iron Carefully: Use a low heat setting and a pressing cloth. Protect the fabric from direct heat.
- Storage: Store clothes in a dry place. Use tissue paper to keep them free from creases.
- Mending: Fix loose threads or missing buttons promptly. This keeps the outfit in its best shape.
- Avoid Sunlight: Keep clothing out of direct sunlight to prevent fading over time.
Following these steps will help maintain the quality of your BJD’s wardrobe. Regular care ensures that each piece remains as attractive and vibrant as when first sewn. Treat each outfit with care, and your 1/6 BJD will always look stylish and well-kept.