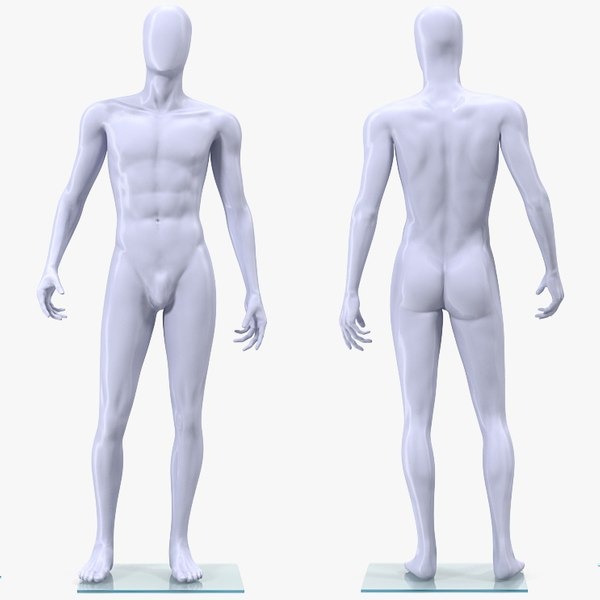
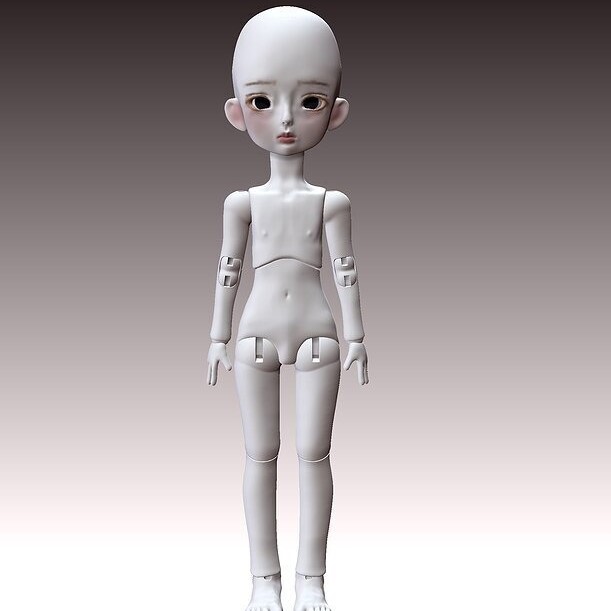
Introduction to BJDs and STL Files
Ball Jointed Dolls (BJDs) are highly customizable dolls known for their ball joints and lifelike features. Collectors and hobbyists often personalize these dolls to reflect their own artistic vision. STL files, or Stereolithography files, serve as the blueprint for 3D printing these intricate BJD parts. They contain the 3D models that printers use to create each unique component.
Creating BJD STL files is both an art and a science. It involves 3D modeling skills and an understanding of the printing process. Beginners will need to learn how to design these files to build their custom BJDs from scratch.
This guide will cover the basics of BJDs and STL files for those new to the scene. We’ll explore the tools you’ll need, the design process, and how to transform your concepts into printable BJD STL files. With these skills, you’ll create dolls that are not only unique but also a reflection of your creativity.
By mastering the creation of BJD STL files, you’ll take the first steps towards crafting custom BJDs that stand out. Whether for personal enjoyment or for commercial purposes, your journey starts here in understanding the relationship between BJDs and STL files.
Essential Tools and Software for BJD STL File Creation
Embarking on your BJD STL file creation journey requires certain tools and software. These form the backbone of the design process, allowing you to translate concepts into printable BJD components. Here, we list the essential equipment to get started:
- 3D Modeling Software: Choose a user-friendly program geared towards beginners. Options like Tinkercad or Blender are excellent starting points.
- Computer with Sufficient Specs: Ensure your computer can handle the demands of 3D modeling software. It should have a robust processor, plenty of RAM, and a good graphics card.
- 3D Printer: While not necessary for designing, having access to a 3D printer lets you test and refine your BJD STL files.
- Calipers: Precision is key in BJD creation. Calipers help you measure parts for accuracy.
- Graphics Tablet: For intricate designs, a graphics tablet can give you more control than a mouse.
- Slicing Software: This converts your STL files into a format your 3D printer can understand. Programs like Cura or Slic3r are widely used.
- File Storage: BJD STL files can be large. An external hard drive or cloud storage will help manage your library.
Invest in these tools and software to create detailed and precise BJD STL files. With the right setup, you’ll transform your creative visions into tangible, 3D-printable works of art.
Fundamentals of 3D Modeling for BJD Parts
Entering the world of 3D modeling for BJD parts can feel daunting at first. Beginners must grasp the fundamentals to create accurate and detailed BJD STL files. Here we focus on the core concepts and skills you’ll need to start.
First, understand the 3D space. Learning to navigate a virtual 3D environment is crucial. Most modeling software uses a grid system to simulate 3D space. Practice moving, scaling, and rotating objects within this environment.
Next, get comfortable with the tools and features of your chosen software. Look into shape creation, the extrusion tool, and modifiers. These are key functions for building the parts of your BJD.
Creating basic shapes is often the starting point. BJD parts, like limbs or torsos, start as simple 3D shapes. Then, you refine these shapes to resemble the final design.
Detailing your model comes after the basic shape is complete. This includes adding articulated joints and ensuring the correct proportions. Attention to detail here is important for the functionality and aesthetics of your BJD.
Also, knowing how to optimize your STL files is a must. The goal is to create files that are not too heavy for the printer to handle but still maintain detail.
Finally, practice is key. Creating BJD STL files is an iterative process. With each attempt, your skills will grow, and your models will improve. Invest time in learning these fundamentals, and you’ll create stunning BJD parts that are ready for printing.
Designing Your First BJD: Tips and Techniques
When designing your first BJD, it’s normal to feel a mix of excitement and uncertainty. Here are some tips and techniques to guide you through the process and enhance your bjd stl files creation skills:
- Start Simple: Begin with a basic sketch of your BJD. This will give you a clear idea of its look and proportions.
- Break It Down: Divide your design into parts. Focus on a limb or the torso before moving to the next piece. This keeps the project manageable.
- Reference Images: Use photos of other BJDs for inspiration. Pay attention to their joints and how they’re assembled.
- Modularity: Design parts that can easily connect. This makes printing and assembly simpler later on.
- Articulation: Ensure your BJD’s joints move freely. Test articulation in your 3D model before printing.
- Symmetry Tools: Many 3D programs offer tools to mirror parts. This ensures both sides of your BJD are identical.
- Iterate: Your first draft is rarely perfect. Refine shapes and details through several iterations.
- Ask for Feedback: Share your design with the BJD community. Constructive criticism can help improve your creation.
Remember, patience and practice play major roles in mastering BJD design. With these tips, your first BJD stl files are bound to be a valuable learning experience, setting the foundation for your future projects.
From Concept to STL: A Step-by-Step Process
Turning your BJD concept into a printable STL file involves several clear steps. Let’s break down the process:
- Sketch your Idea: Begin with a detailed drawing of your BJD. Keep proportions and joint placements in mind.
- Choose the Right Software: Select a 3D modeling program that fits your skill level and the complexity of your project.
- Model in Parts: Work on individual components. Start with larger sections like the head or body.
- Define Joints: Make sure to incorporate the ball joints your design will need for proper articulation.
- Add Details: Gradually refine your model by adding textures, facial features, and other fine details.
- Check for Errors: Use software tools to inspect your model. Look for holes or non-manifold edges that could cause problems.
- Optimize for Printing: Simplify the model where possible. Ensure the bjd stl files have the right thickness and support structures.
- Export as STL: Once satisfied, export your model as an STL file. This file is what you’ll use to 3D print your BJD.
- Validate Your File: Run your STL file through a validation tool to check for any last-minute issues. Programs like Meshmixer can help with this step.
- Print a Test Model: If possible, do a small-scale print to check the fit and function of joints. Make adjustments as needed.
Each of these steps takes you closer to realizing your personalized bjd stl files. Keep refining your process and learn as you create. Your dedication will pay off when you see your unique BJD come to life.
Printing your BJD STL Files: What You Need to Know
Once you’ve got your bjd stl files ready, it’s time to bring them to life with your 3D printer. Here are some crucial points to consider when you reach this stage:
- Printer Calibration: Make sure your 3D printer is properly calibrated. Good calibration ensures print quality and part accuracy.
- Material Selection: Choose the right filament for your BJD. Different materials can affect durability and the finish of printed parts.
- Printing Resolution: Higher resolutions capture more detail but take longer to print. Find a balance that works for your design.
- Support Structures: These are vital for complex parts. They prevent sagging and distortions during printing.
- Monitoring Prints: Keep an eye on your print. This helps you spot and fix issues early on.
- Post-Processing: After printing, you’ll need to remove supports and sand parts for a smoother surface.
By paying attention to these factors, you’ll be able to print bjd stl files successfully. Remember, testing and refining are part of the process. So, don’t worry if you don’t get it right on the first try!
Finishing and Assembling Your BJD After Printing

After printing your bjd stl files, the next steps involve finishing and assembling your creation. The transformation from a printed part to a polished BJD involves several meticulous tasks:
- Trimming and Sanding: Carefully remove any excess material. Sand down the surfaces to get rid of any rough edges.
- Assembly: Fit the parts together. Make sure joints connect smoothly and the BJD can pose as intended.
- Painting: Use acrylics or airbrushing to add color. Paint carefully for a professional look.
- Adding Details: Wigs, eyes, and clothes bring your BJD to life. Choose or make these with care to match your envisioned design.
- Stringing: Elastic cords are used to string the BJD. They must be the right tension to hold poses.
Following these steps will ensure your BJD looks great and is fully functional. Take your time with each task to achieve the best results.
Troubleshooting Common Issues with BJD STL Files
Creating BJD STL files can sometimes lead to unexpected challenges. Identifying and resolving these issues is a critical part of the design process. Here are common problems you might encounter and how to troubleshoot them:
- Non-Manifold Edges: These occur when edges don’t form a solid boundary. Use your modeling software’s tools to highlight and fix non-manifold geometry.
- Wall Thickness: Parts that are too thin may not print correctly. Check if your software has a thickness analysis tool and adjust wall thickness as needed.
- Misaligned Joints: Joints that don’t align correctly won’t function properly. Align and test joints in your 3D modeling software before printing.
- Printing Errors: Sometimes the printer might produce errors. Check calibration, filament, and print settings if the output isn’t as expected.
- File Size Too Large: Large bjd stl files can be problematic to handle. Optimize your model by reducing polygon count without losing detail.
- Poor Detail Resolution: If details are blurry, increase the resolution. However, keep in mind this will raise the printing time.
- Weak Structuring: Fragile or snapping parts indicate a need for stronger design. Add supports or increase thickness in stress areas.
Experiment with your BJD STL files, ask for advice from the community, and learn from each correction. With practice, troubleshooting will become an easier, almost intuitive part of your workflow.
Expanding Your Skills: Advanced Design Techniques for BJDs
After mastering the basics of BJD STL file creation, it’s time to enhance your skills. Advanced design techniques will help you create more complex and detailed BJDs. Here are several methods to level up your design capabilities:
- Incorporate Kinematics: Understand movement mechanics. Design joints that mimic human motion for realistic poses.
- Use Digital Sculpting: For detailed faces and textures, digital sculpting tools add life-like qualities to your BJDs.
- Employ Boolean Operations: Combine or subtract shapes in your 3D model to create intricate parts.
- Master Layers and Masks: These help in texturing and refining surfaces without altering the base shape.
- Adopt Multi-Part Molding: Design parts for multi-part molds if you plan to cast your BJDs in materials like resin.
Employing these advanced techniques requires practice and patience. However, they allow you to push the boundaries of your creativity and produce truly unique bjd stl files. As you grow more proficient, continue exploring new tools, methods, and the vast potential of 3D modeling to bring your imaginative BJD concepts to life.