Introduction to BJD and 3D Printing
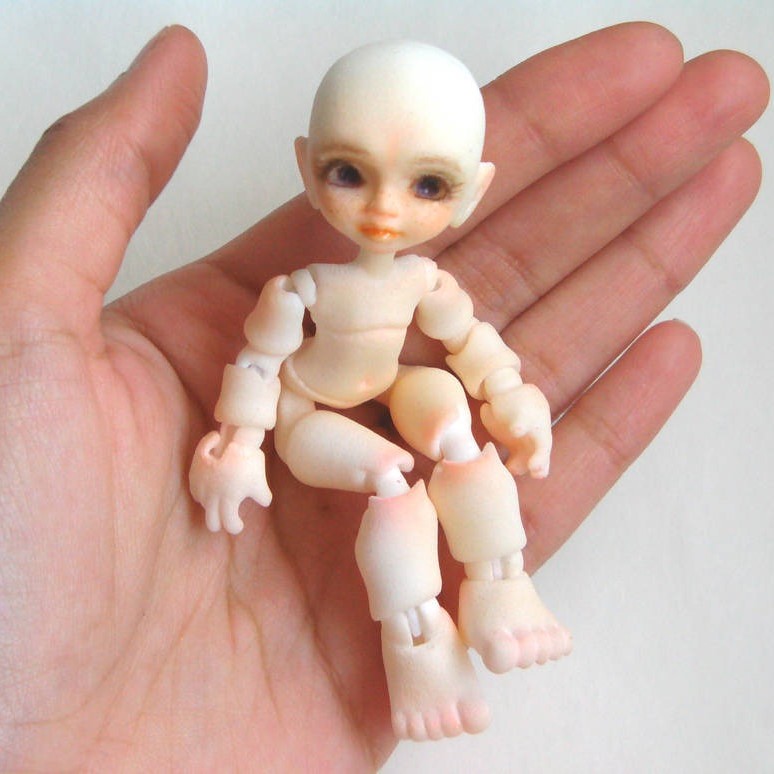
BJDs, or Ball-Jointed Dolls, are highly customizable dolls. They feature articulating joints similar to human joints. These dolls have become favorites among collectors and hobbyists for their beauty and versatility. Now, 3D printing technology lets you create your own BJD at home. 3D printing is a process where you can produce a three-dimensional object. This is done layer by layer using a digital model. For BJD enthusiasts, 3D printing opens new possibilities. You can design, customize, and print your personal BJDs.
Combining 3D printing with BJDs is exciting. It allows for precision and creativity in creating detailed dolls. With 3D printing, the limitations of traditional doll-making are gone. You can experiment with designs that were once too complex. This DIY approach also makes creating a 3D printed BJD accessible to more people. Enthusiasts can share their unique creations with a global community. If you are looking to start this rewarding hobby, understanding both concepts is key. We’ll explore the essential tools, design tips, and best practices. By the end, you will be ready to print and assemble your own 3D printed BJD.
Essential Tools and Materials for 3D Printing BJDs
Creating your own 3D printed BJD requires specific tools and materials. To start, a reliable 3D printer is crucial. It’s the heart of the process. Look for one that can handle the detail needed for BJDs. Next, you need filament. This is the printer’s ‘ink’. Popular options for BJDs include PLA and ABS; each has benefits. PLA is user-friendly and good for beginners. ABS is tougher but needs careful handling due to fumes.
You also need 3D modeling software. It will turn your designs into printable files. There are free and paid versions available, tailored to different skill levels. For post-printing, get sandpaper. It helps smooth out your BJD’s surface. X-acto knives are also useful. They trim away any excess material with precision. Don’t forget the stringing material. Elastic cords work well. They hold the doll parts together and allow for movement.
For assembly, a set of precision screwdrivers can come in handy. They tighten joints and ensure your BJD moves smoothly. Lastly, a clear work space is essential. It keeps you organized and safe while you build your doll. With these tools and materials, you’re set to begin your 3D BJD printing adventure.
Designing Your BJD: Software and Modeling Tips
Designing a 3D printed BJD requires patience and creativity. The first step is to choose the right software. Look for 3D modeling programs tailored to sculpting and character creation. Programs like Blender, Tinkercad, or ZBrush are user-friendly and popular in the 3D printing community. They offer a range of tools and features for detailed design work.
When you start modeling your BJD, keep a clear image of your desired outcome in mind. Begin with a simple prototype or sketch. With your software, create the doll’s basic shape. Gradually add details like the face, hands, and joints. Pay special attention to joints. They need precise design for proper movement.
Here are some modeling tips:
- Use reference images to ensure accuracy in proportions and features.
- Break down your model into separate parts such as the head, torso, arms, and legs.
- Keep the wall thickness in mind to ensure the parts are strong enough when printed.
- Make sure the joints fit well. Test this within the software using simulation tools.
- Save your work often and back it up. Loss of data can mean starting from scratch.
By following these tips while using 3D modeling software, you can craft a unique and personal BJD design. The 3D modeling stage is crucial, as it lays the foundation for your physical doll. Take your time, experiment, and enjoy the process of bringing your doll to life digitally before it goes to print.
Printing Your BJD: Step-by-Step Process
After designing your 3D printed BJD, it’s time to bring it to life. Here’s a simplified step-by-step guide to printing your BJD with ease:
- Preparation: Start by preheating your 3D printer. Make sure the print bed is level and clean. Choose the right filament. For a BJD, PLA is a great choice for beginners, while ABS offers a sturdier finish.
- Slicing the Design: Load your 3D model into a slicing software. This software divides your design into layers the printer follows. Adjust settings like print speed, layer height, and support structures.
- Print Settings: Fine-tune your printer settings. A slower speed can improve detail. A higher layer resolution captures finer details but takes longer to print.
- Printing: Carefully start the printing process. Monitor the first few layers to ensure everything goes smoothly.
- Supervision: Keep an eye on the print as it progresses. Watch for any signs of shifting or problems. Address them quickly to avoid ruining the print.
- Completion: Once the print finishes, let it cool down before removing it. Cooling helps to reduce warping or distortion of the parts.
It’s important to remember that 3D printing a BJD can be a trial-and-error process. Patience is key. Take notes on what works and what doesn’t for future reference. By following these essential steps, your 3D printed BJD will soon be ready for the next stage: cleaning and post-processing.
Cleaning and Post-processing Your Printed BJD
Once you have printed your 3D BJD parts, cleaning and post-processing them is essential. This stage refines your pieces and prepares them for assembly. Post-processing can also enhance the aesthetic quality of your BJD.
Here are the key steps for cleaning and post-processing:
- Removing Support Structures: Gently remove any support material from the print. Use pliers or tweezers for hard-to-reach areas.
- Sanding: Start with a coarse grit sandpaper to remove the larger imperfections. Gradually use finer grits to smooth the surface.
- Filling and Repairing: If there are gaps or cracks, use a putty or filler. Apply it to the area and sand it down after it dries.
- Priming: Once the surface is smooth, apply a primer. This helps paint adhere better and provides a consistent base color.
- Quality Check: Inspect the parts for any missed spots or rough areas. Address them before moving to assembly.
Post-processing requires patience, but it greatly improves your BJD’s appearance. With these steps complete, you can move forward with assembling your doll.
Assembling and Stringing Your BJD
Once your 3D printed BJD parts are clean and smooth, assembly begins. This step is where your doll takes shape and gains its unique character. This process involves attaching all the separate parts together using stringing material, typically elastic cord. Here’s how to go about it:
- Gather Your Parts: Lay out all your printed parts. Make sure you have everything you need.
- Plan the Assembly: Think about the order you’ll attach each part. Start from the largest piece.
- Stringing: Cut the elastic cord to the needed length. A bit extra is better than too short.
- Knotting: Tie secure knots to prevent the string from slipping through the doll parts.
- Attaching Parts: Begin by stringing the legs and arms, then move on to attaching the torso and head.
- Adjusting Tension: The cord’s tension determines joint movement. Adjust it to your liking.
- Final Checks: Once assembled, check the movement of each joint. Ensure your BJD poses well.
Assembling a 3D printed BJD may be complex at first. But with patience and practice, it gets easier. Your BJD’s articulation and stability largely depend on proper stringing. So, take your time and don’t rush. Make sure to refer back to your design plans to guide you through the assembly. As you go along, you may find that making slight adjustments is necessary for the perfect fit and mobility. Remember, this stage is not just about putting parts together; it’s about bringing your creative vision to life.
Painting and Customizing Your BJD
After assembling your 3D printed BJD, the fun of customization begins. You can paint your doll to bring out its unique personality and style. Here is how you can paint and customize your BJD efficiently:
- Choosing Paints: Select acrylic or enamel paints that adhere to plastic. Make sure they are safe for use on 3D printed materials.
- Base Coat: Apply a thin base coat to help subsequent layers of paint stick better. Allow it to dry completely.
- Painting Details: Use fine brushes for small areas like the face and hands. Be patient and let layers dry between applications.
- Sealing: After painting, use a sealant spray to protect the paint from scratches and chips.
- Accessorizing: Add wigs, eyes, and clothes to your BJD for further personalization. This adds depth and personality to your creation.
- Makeup and Features: Apply makeup to your BJD’s face for lifelike features. Use pastels or watered-down paint for a natural look. Rub off excess with a clean brush.
Customization doesn’t end with painting. You can also model additional accessories or parts with your 3D printer. These could include shoes, hats, or even wings. Your creativity is the only limit when it comes to personalizing your BJD. Every detail reflects your vision, from the colors you choose to the accessories you add. By following these steps, your 3D printed BJD becomes a one-of-a-kind work of art.
Best Practices for Durable and Articulate Joints
Achieving durable and articulate joints is key in crafting a 3D printed BJD. This ensures fluid movement and the longevity of your doll. Here are the best practices to make joints that both move well and last long:
- Use the Right Material: Select filaments like ABS or Nylon for their strength. They are ideal for the joints that experience frequent movement and wear.
- Design with Tolerances in Mind: Allow for slight space between joint parts to prevent friction. This space lets the parts move freely without too much resistance.
- Reinforce Stress Points: Add extra thickness to areas under tension. This prevents breakage and wear over time.
- Smooth the Joints: Ensure the joint surfaces are sanded smoothly. Rough surfaces can hinder movement and cause wear.
- Test the Fit: Before final assembly, check that all joints fit and move as intended. Adjust as needed for perfect articulation.
- Use Elastic Cords Wisely: Select the correct thickness of elastic cord to hold parts firmly yet allow for movement.
- Regular Maintenance: Keep joints clean and check for any signs of wear. Regular maintenance can extend your BJD’s life.
By integrating these practices into your BJD creation process, the joints will perform beautifully and withstand the test of time. Patience and attention to detail will result in a doll that is not only visually stunning but also fully poseable and durable.