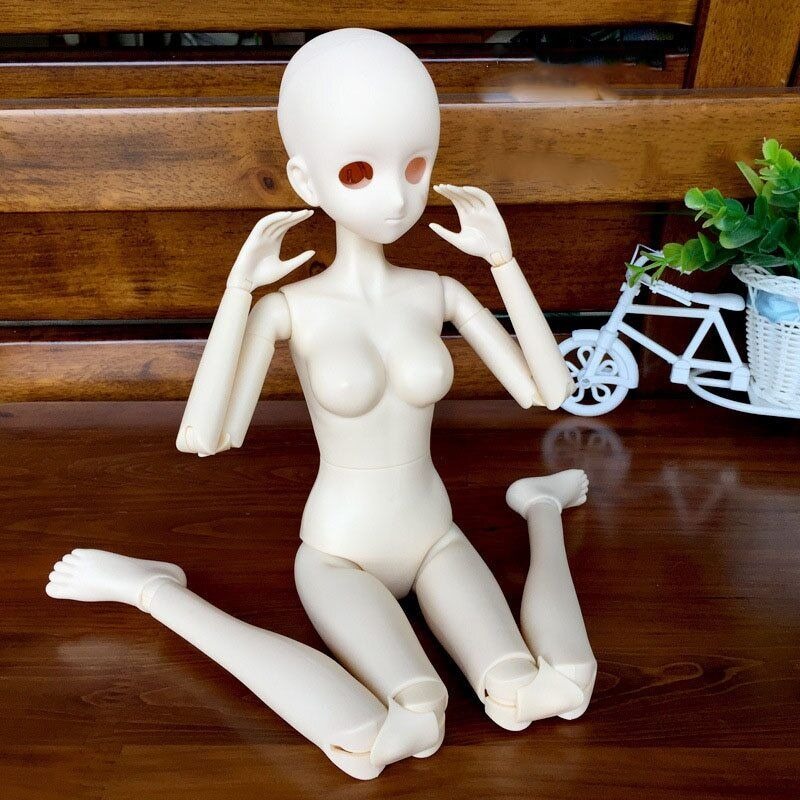
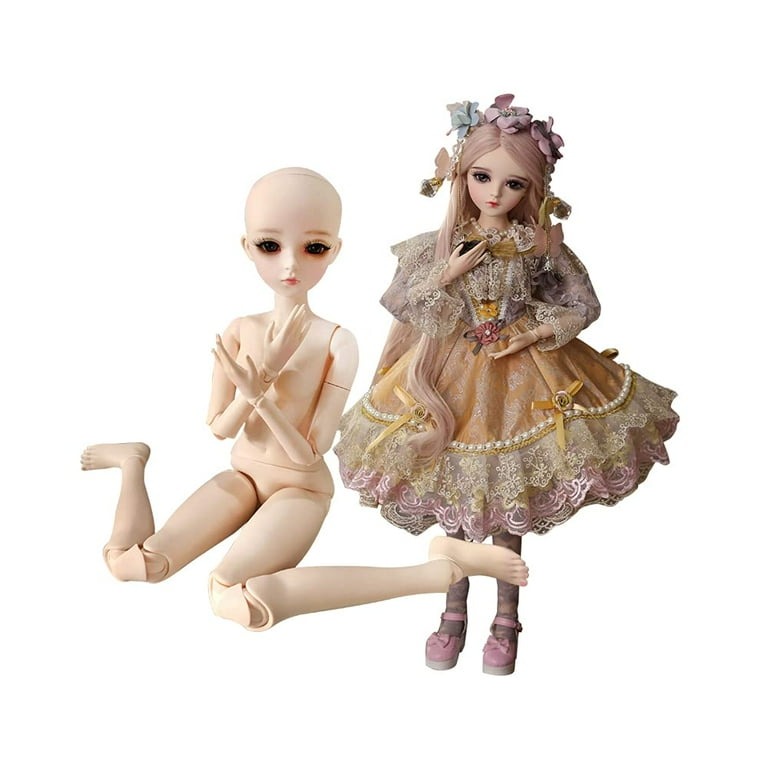
Introduction to Ball Jointed Dolls (BJDs)
Ball Jointed Dolls, or BJDs, are unique collectibles. They hinge on artistry and customization. Crafted from resin, BJDs boast interchangeable parts. This makes them highly customizable. Each BJD body reflects its maker’s skills and imagination. Hobbyists enjoy the freedom to create diverse looks. They sculpt, cast, and paint each body part. This includes heads, limbs, and torso sections. Collectors treasure BJDs for their beauty and uniqueness. Creating a BJD body is complex but rewarding. It’s a blend of sculpture, painting, and engineering.
Essential Tools and Materials for BJD Making
Engaging in BJD making requires specific tools and materials. It’s the foundation for crafting a unique BJD body. Here is a list of essentials every beginner should have:
- Sculpting Tools: Obtain a set of sculpting tools. These typically include wire tools, ribbon tools, and loop tools. They help shape the clay or wax for your bjd body parts.
- Clay or Wax: A high-quality clay or wax is vital. You’ll use it to sculpt the initial form of the BJD. Options include polymer clay or oil-based clays suitable for finer details.
- Molding Materials: Silicone rubber materials are used for creating molds. These molds will then be used to cast the bjd body parts in resin.
- Casting Resin: Clear resin is commonly used for casting BJD parts. Be sure to choose a resin that cures hard and clear for best results.
- Sandpaper and Files: These are necessary for smoothing and refining the surfaces of your BJD parts after removing them from the molds.
- Stringing Materials: Elastic cords are used for stringing the bjd body parts together. This gives your doll the flexibility and tension it needs to pose.
- Paints and Brushes: Acrylic or airbrush paints will bring your BJD to life. Use fine brushes for detailing.
- Protective Gear: Always wear protective gear. This includes gloves, masks, and eyewear when handling materials.
Gather these items before you start. They set the stage for a smoothly run BJD project. While this list may seem daunting, each tool plays a crucial role. They shape, refine, and complete your bjd body creation. Prepare your workspace and organize your tools. This will make your BJD making journey efficient and more enjoyable.
Understanding BJD Anatomy and Proportions
Crafting a BJD body starts with understanding its anatomy. The proportions of BJDs differ from those of humans. Their features may be more exaggerated or stylized. For beginners, start by studying reference images or actual BJDs. Pay close attention to the head size, limb length, and torso shape. These elements will guide you in sculpting your doll accurately.
- Head Size: The head of a BJD is often larger in proportion to the body. This lends the doll a unique, often ethereal appearance.
- Limb Length: BJD limbs can be elongated for a graceful effect or kept proportional for a more natural look.
- Torso Shape: The torso may be slender and elongated or have a more realistic human form.
Remember that the beauty of creating a bjd body lies in the ability to stylize. You can choose the look that resonates with your artistic vision. Beginners should consider starting with a standard BJD anatomy. This will help in grasping the basics of proportion before venturing into more creative designs. Practice sketching your BJD’s anatomy before molding. This will help in visualizing the final product. Don’t be afraid to make adjustments as you go. This is part of the creative process and helps in achieving a bjd body that’s uniquely yours.
Step-by-Step Process of Sculpting a BJD Body
Embarking on the journey to sculpt a bjd body can be exhilarating. Follow these steps to ensure that your sculpting process runs smoothly:
- Design Conceptualization: Start by sketching your bjd body’s design. Mind the proportions and anatomy previously studied. This will be your blueprint.
- Building the Armature: Create a wire armature. It will support your sculpture. Use aluminum wire for flexibility and strength.
- Sculpting the Core: With the armature in place, begin to layer your chosen clay. Shape the core bjd body, starting with the torso.
- Refining Details: Add finer details to the face, hands, and feet. Use your sculpting tools for precision. Work slowly to refine each feature.
- Symmetry Checks: Ensure that both sides of the bjd body are symmetrical. Use reference points on the armature to achieve balance.
- Curing the Clay: If you’re using polymer clay, bake it according to the manufacturer’s instructions. Oil-based clays do not require curing.
- Sanding and Smoothing: Once cured, sand the bjd body to remove imperfections. Start with coarse sandpaper and move to finer grits for a smooth finish.
By following these steps and applying patience, you’ll have a beautifully sculpted bjd body ready for the next stage in the creation process.
Techniques for Casting BJD Parts in Resin
Once you have your bjd body sculpted, the next step is casting. This involves making molds and pouring resin. Here’s how to do it:
- Creating the Molds: Design silicone rubber molds around your clay parts. Make sure they’re secure and free of leaks.
- Preparing the Resin: Mix your clear casting resin according to the instructions. Aim for a bubbly consistency to prevent air pockets.
- Casting the Parts: Pour the resin into the molds slowly. Tap the molds to release trapped air.
- Curing the Resin: Let the resin set. The time needed depends on the product you use. Check the resin’s instructions for specifics.
- Demolding: Once the resin parts are fully cured, gently remove them from the molds. Be careful not to break them.
- Cleaning the Parts: Use sandpaper and files to clean up any excess resin. Also, smooth rough edges for a perfect fit.
Casting resin parts can be tricky. But with patience and practice, you’ll create beautiful bjd body parts. Remember, always wear protective gear when handling resin. Safety is key in this process.
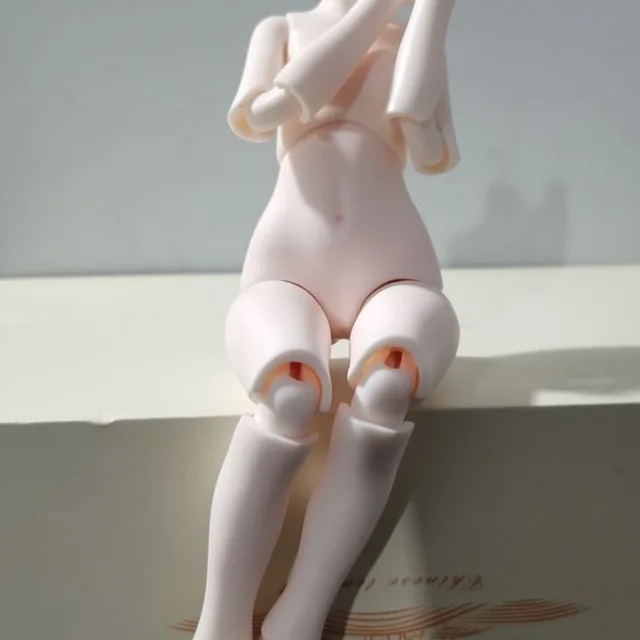
Assembling and Stringing Your BJD
After crafting the individual bjd body parts, assembling and stringing them is the next step. This process makes your doll poseable and gives it the signature flexibility BJDs are known for. Here’s a simplified step-by-step guide to help you through the assembly:
- Prepare the Elastic Cord: Measure and cut a strong elastic cord. It should be long enough to string through the entire bjd body.
- Knotting the Cord: Tie secure knots at the ends of the cords. These will act as anchors inside the doll’s limbs.
- Starting with the Legs: Begin stringing the elastic through the legs. Attach the legs to the pelvis. The tension should be firm but allow movement.
- Connecting the Torso: Next, thread the elastic through the torso. Make sure it’s tight enough to hold the body upright.
- Attaching the Arms: Finally, string the arms and hook them to the shoulder joints. Adjust for proper tension.
- Hooking the Head: The head is often the last part to be added. Connect it to the top of the torso with the cord.
- Adjusting Tension: Check the tension by posing the doll. It should move smoothly without being too loose or tight.
- Securing the Hooks: Make sure all hooks or S-hooks are fastened well. They should not come loose during movement.
- Final Checks: Pose your BJD in various positions to ensure all parts move and hold as they should.
With these steps, your BJD will soon be ready to display its full range of motion, standing out with its intricate detail and the craftsmanship you’ve poured into every joint and curve.
Customizing and Painting Your BJD Body
Once assembled, the bjd body is a blank canvas. Customizing and painting add personality and bring your doll to life. Here’s how to approach this creative stage:
- Plan Your Design: Before painting, decide on your doll’s look. This includes eye color, makeup, and body art.
- Prep the Surface: Gently sand the bjd body. A smooth surface helps paint adhere better.
- Priming: Apply a primer. It creates an even base for your colors. Let it dry completely.
- Painting Techniques: Paint with acrylics or airbrushes. Thin layers work best. Let each layer dry before adding another.
- Adding Details: Use fine brushes for intricate details like facial features. Keep a steady hand.
- Sealing the Paint: Once satisfied, seal the paint. Clear sealants protect the bjd body from scratches and chips.
- Assembly: After painting, reassemble your doll if needed. Be gentle to prevent smudges.
Take your time with each step. Customization is a crucial part of the bjd body’s uniqueness. Explore different styles and techniques. Remember, there’s no right or wrong way to express your creative vision. Your BJD is a reflection of your artistry and passion.
Tips for Maintaining and Caring for Your BJD
Caring for your BJD ensures it remains in pristine condition. Follow these maintenance tips:
- Regular Cleaning: Gently wipe your bjd body with a soft cloth. This keeps it dust-free.
- Avoid Direct Sunlight: UV rays can damage the resin. Store your doll away from sunlight.
- Humidity Control: Keep your BJD in a climate-controlled room. High humidity can harm the resin.
- Proper Storage: When not on display, store your BJD in a padded case. This prevents damage.
- Joint Care: Check the joints regularly. Tighten any loose stringing for optimal poseability.
- Paint Touch-Ups: Inspect the paintwork. Make small touch-ups if needed with a fine brush.
- Avoid Stains: Keep your BJD away from colored fabrics. They can stain the resin.
- Handle with Care: Always handle your doll with clean hands. This helps avoid oil transfers.
With these tips, your bjd body will continue to look great for years. Treat it with love and attention, and it will surely be a lasting work of art in your collection.