Introduction to BJD Base Creation
Creating a BJD base starts with understanding what a BJD base is. A BJD, or Ball-Jointed Doll, base forms the very essence of a custom doll. It is like a blank canvas for artists and hobbyists who wish to breathe life into their unique vision of a doll. Crafting a BJD base requires precision, patience, and a creative touch to mold it into the perfect shape.
The process kicks off with selecting suitable materials. This step is vital as it impacts the durability and aesthetics of the finished doll. Once materials are ready, the journey of creation begins. You will need to sketch your design, sculpt with attention to detail, carefully sand and smooth out imperfections, paint with vibrant colors, and finally, seal and assemble your masterpiece. Along the way, customization plays a key role in ensuring that your BJD base stands out.
Whether you are a seasoned professional or a curious beginner, the world of BJD base creation is within your reach. We will explore the tools, techniques, and tips necessary in the subsequent sections to help you create a BJD base that you can be proud of. This guide will provide you step-by-step instructions to make the process as smooth as possible. Let’s embark on this artistic journey together.
Essential Tools and Materials for BJD Base Making
To start making a BJD base, gather the right tools and materials. Quality matters when selecting materials for durability and aesthetics. You’ll need polymer clay, a popular choice for its versatility and ease in shaping. Armature wire is essential to form the doll’s skeleton. It provides structure and stability. Other tools include sculpting tools for detail, sandpaper for smoothing, and acrylic paints for coloring.
Choose your materials carefully. Opt for high-quality polymer clay that can withstand baking and molding. For armature wire, a flexible yet sturdy gauge is best. Keep a range of sculpting tools on hand. Different shapes and sizes will help with varied details. Sandpaper should range from coarse to fine grits. This will allow for thorough smoothing. Acrylic paints are a go-to for their wide color range and ease of use.
Remember, the tools and materials you choose will affect your BJD base outcome. Invest in the best you can afford, and take care of your tools for long-term use.
Designing Your BJD Base: Concepts and Sketching
The first step in creating your custom BJD base is to unleash your creativity by conceptualizing the design. Begin by picturing the doll’s features. Think about the face, body proportions, and overall look. Are you aiming for a realistic human figure, or perhaps a whimsical fantasy creature? This initial vision sets the tone for your BJD base.
Now grab your pencils and paper; it’s time to sketch. Don’t worry about getting it perfect on the first try. Sketching is a process to refine your ideas. Start with basic shapes to outline your BJD’s form. Slowly add details, such as the eyes, nose, lips, and hair. Sketch the body, considering the joints since they are crucial for a BJD. The arms, legs, and torso should combine flexibility with stability.
Remember to scale your sketches. They should reflect the actual size you want it to be. This ensures that when you move to sculpting, the proportions remain consistent. Take your time, make revisions, and experiment with different poses. This is your chance to perfect the doll’s structure before you begin the hands-on work.
Through sketching, you’ll identify potential issues and make necessary adjustments. This will save you time and materials in later stages. The better your sketch, the smoother the transition to sculpting. A well-thought-out design is the foundation of a successful BJD base. With your sketches complete, you’re now ready to bring it to life in three dimensions.
Sculpting Techniques for BJD Bases
When it’s time to sculpt your BJD base, patience and precision are your best friends. Here are some step-by-step techniques to guide you through the process:
- Start with the Skeleton: Begin by shaping the armature wire into the basic outline of it. This is the framework that gives the doll its pose and structure.
- Apply the Clay: Take your polymer clay and warm it in your hands to make it malleable. Apply it over the armature, adding bulk to the wire frame. Make sure to cover it completely and evenly.
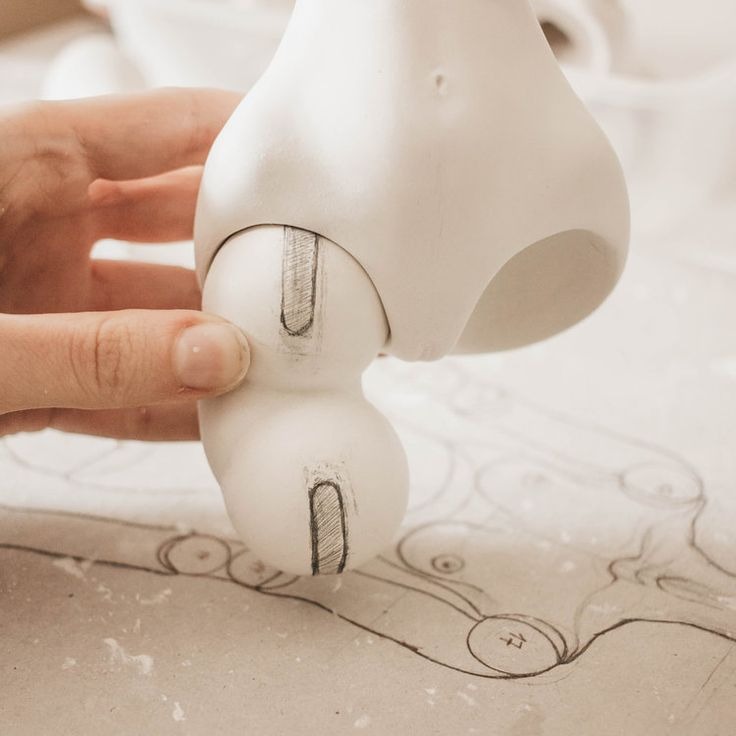
- Rough Shaping: With your hands, press and shape the clay to form the rough silhouette of it. Look back at your sketches to keep the proportions accurate.
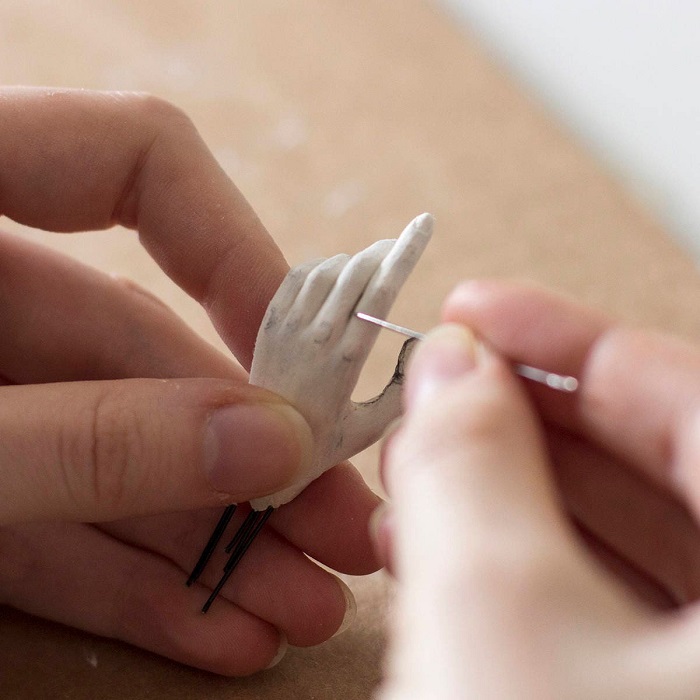
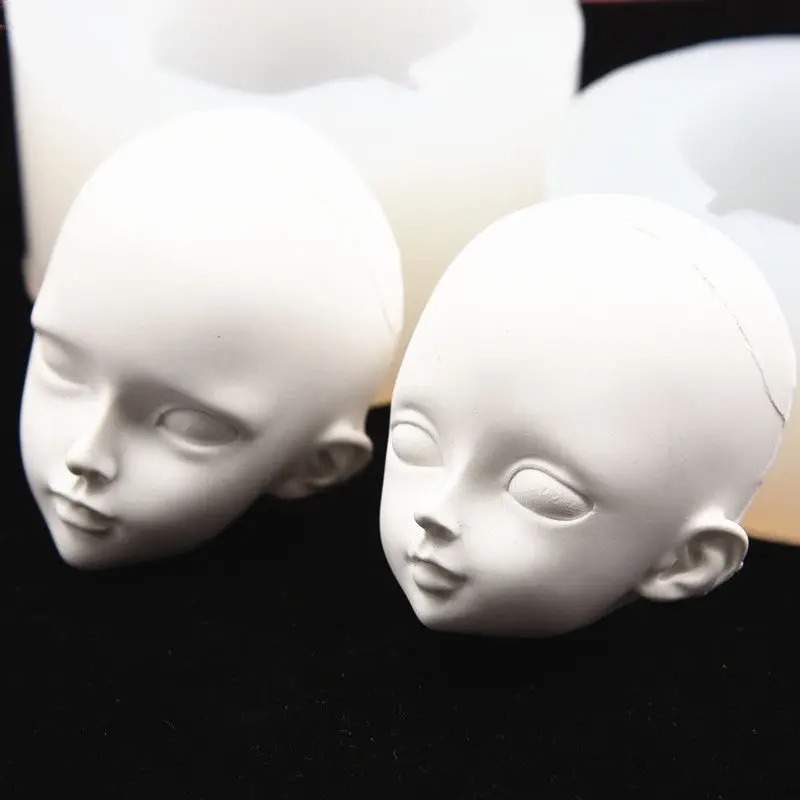
- Detailing: Utilize your sculpting tools to add fine details. Carve out the facial features, define the fingers and toes, and sculpt the joints meticulously. Remember to keep symmetry in mind.
- Refine the Sculpt: As the form develops, constantly compare with your initial design. Smooth out bumps and adjust contours for a more lifelike appearance.
- Cure the Clay: Once you’re satisfied with the sculpt, it’s time to harden the clay. Follow the manufacturer’s instructions for baking. This will set the sculpture, preparing it for the sanding phase.
Throughout the sculpting process, keep referring to your design sketches to maintain accuracy in your BJD base. If you follow these steps closely, the outcome will be a well-crafted BJD base, ready for the next stages of creation. Remember to let your creativity shine through as you sculpt, while also adhering to your planned design.
Sanding and Smoothing: The Key to a Flawless Finish
Once you have completed the sculpting of your bjd base, it’s time for sanding and smoothing. This step is crucial for achieving a flawless finish on it. Sanding removes any imperfections and prepares the surface for painting. Smooth textures are essential for a professional look.
Here’s how to go about it effectively:
- Start with Coarse Grit: Use coarse grit sandpaper to file down the obvious rough spots. Do this gently to avoid damaging the details you sculpted.
- Progress to Finer Grits: Gradually move to finer grit sandpapers. This will get rid of smaller scratches and smooth the surface further.
- Dust Off Regularly: After each round of sanding, brush off the dust. This helps you see areas that need more work and prevents clogging your sandpaper.
- Check Your Work: Frequently check it against light. This will reveal any uneven surfaces or scratches that still need to be sanded out.
- Use a Damp Cloth: Wipe your BJD base with a lightly dampened cloth. It picks up residual dust and shows you the real finish.
- Finish with Polishing: Once smooth, use a polishing compound for an extra fine finish. This step brings out a doll’s true beauty, getting it ready for painting.
Sanding is a gradual process, it might take several rounds to achieve perfection. Patience is key. Take breaks if necessary to return with a fresh eye. The smoother your BJD base, the better the paint will adhere, resulting in a beautiful final product. With a smooth and seamless BJD base, you can move on to the exciting step of painting and sealing to truly bring your doll to life.
Painting and Sealing Your BJD Base
Painting your BJD base is where your doll starts to come alive with colors and personality. Here’s how to approach the painting process:
- Choose Your Paints: Decide on acrylic paints for their vibrant colors and ease of use. Ensure they are safe for polymer clay.
- Plan Your Color Palette: Before you start, select a color scheme. This keeps the painting focused and cohesive.
- Apply Base Coats: Start with a thin base coat to help subsequent layers stick. Let it dry fully.
- Add Details with Fine Brushes: Use fine brushes for facial features and small details. Steady your hand and take your time.
- Layer Colors: Build up color intensity with multiple thin layers. Allow each layer to dry before applying the next.
- Use Varnish: Once the paint has dried, use a high-quality varnish to seal your BJD base. It protects the paint and adds a smooth finish.
Sealing is as important as painting. It not only protects it but also enhances the visual appeal. Use a varnish that is compatible with your paints and apply it evenly, avoiding drips and streaks. Let the varnish dry as instructed by the product. After sealing, your BJD base is ready for the final assembly and customization stage.
Assembling and Customizing Your BJD Base
Once your BJD base is painted and sealed, it’s time for assembly and customization. This final phase brings together all the components of your BJD. Attention to detail here is critical. Here’s what you need to know:
- Assembling the Parts: Fit the limbs and head onto the body using the joints you’ve sculpted. Make sure each part moves smoothly.
- Adding Elastic or Strings: Secure the joints with elastic strings that allow for poseability. Tighten them just right — not too loose, not too tight.
- Attaching Eyes and Wigs: Insert the eyes and apply the wig. These elements add life and personality to your doll.
- Tailoring Clothes: Dress your BJD base in clothes that match your vision. Sewing custom outfits adds a personal touch.
- Final Touches: Add accessories to complement your doll’s look. Think jewellery, shoes, or even tattoos.
Customizing your BJD base is where your style shines. You can add makeup, modify features, or create themed costumes. Every choice reflects your creativity. Embrace the process, and don’t rush. Your effort will result in a unique BJD, one with character and charm.
With your BJD base assembled and customized, you’ve fulfilled your vision. What started as a simple sketch is now a tangible work of art. Cherish your creation and the journey you took to craft it. Don’t forget to share your masterpiece with the community. Inspire others, and maybe start planning your next BJD base adventure!
Tips for Maintaining and Storing Your BJD Base
Creating a BJD base is just the start. To keep it looking great, proper maintenance and storage are essential. Here are some tips to help preserve your BJD base:
- Clean Regularly: Dust can gather on it and damage its finish. Use a soft brush to gently remove dust.
- Avoid Direct Sunlight: Sunlight can fade the paint on your doll. Store it away from windows or in a shaded place.
- Control Humidity: Too much moisture can harm the materials. Keep your BJD in an area with stable humidity levels.
- Handle with Care: Always touch your BJD with clean hands to avoid transferring oils or dirt.
- Use a Display Case: A display case shields it from dust and damage. It also looks great as decor.
- Rotate Joints Gently: Move the joints of your BJD base carefully to prevent wear and tear.
- Keep Away from Pets: Protect your BJD base from pets that may scratch or chew on it.
- Use Acid-Free Tissue for Padding: When storing, wrap your BJD base in acid-free tissue to protect it.
- Avoid Tight Clothing for Long Periods: Tight clothing can leave marks. Change your doll’s outfits now and then.
- Check for Repairs: Look over your BJD base often for any signs of wear that need fixing.
By following these tips, your BJD base will remain in pristine condition for years to come. Treat your BJD base with love, and it will continue to inspire you in your creative endeavors.