Building a paper doll house template is a delightful activity that combines creativity, imagination, and fine motor skills. This project is suitable for all ages, making it an excellent way for families to bond. With minimal supplies, you can embark on an exciting journey to create a miniature home for paper dolls. Not only is it enjoyable, but it also sparks creativity in both children and adults. This article will provide a comprehensive guide with detailed instructions to make your dollhouse project successful.
Materials Needed for Your Paper Doll House
To begin your dollhouse project, you will require several materials. First, gather a sturdy piece of cardboard. Cardboard will form the base structure of your dollhouse. Additionally, you will need scissors for cutting the cardboard and colored markers or paints to add decorative elements. Furthermore, glue or double-sided tape will secure different parts together.
Choose Your Cardboard Wisely
It is essential to select the right cardboard for your house. A thicker cardboard provides a more stable structure. Using recycled cardboard is an eco-friendly option that is budget-friendly. This approach promotes sustainability while ensuring that you do not compromise quality.
Gather Decorative Supplies
In addition to the basics, think about gathering decorative supplies such as stickers, origami paper, or fabric scraps. These materials will help you personalize your dollhouse. Each decorative element will reflect your unique style and taste. Thus, gathering these items will elevate your project and enhance its visual appeal.
Designing Your Paper Doll House Layout
Before jumping into construction, planning your dollhouse layout is crucial. This step allows you to envision the overall structure and room placement. You can sketch your design on paper. Alternatively, software applications may help visualize dimensions and spaces.
Room Division
Consider how many rooms you wish to include. Commonly, dollhouses feature a living room, bedroom, kitchen, and bathroom. However, you have the freedom to customize these spaces as you see fit. Each room should serve a purpose, contributing to the overall theme of your dollhouse.
Create a Flow
An effective layout should facilitate movement between rooms. Ensure the doors and connections between spaces allow for a logical flow. As you create your design, sketch in window placements to provide light. Achieving balance is vital for creating an inviting dollhouse.
Cutting and Assembling the Base
Once your design is ready, it’s time to cut and assemble the base of your dollhouse. Using scissors carefully, cut out shapes according to your plan. Precision is crucial in this stage, as uneven cuts affect the final structure.
Constructing Walls and Roof
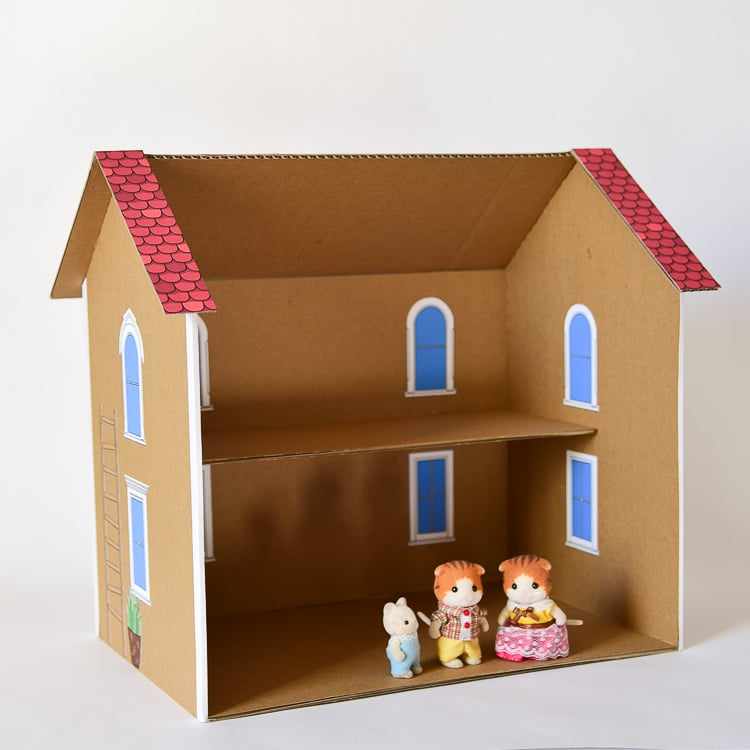
Next, start establishing the walls of your dollhouse. Attach each wall securely with glue or tape. It helps to hold the pieces together while they dry. After the walls are in place, create the roof. You can give it a slanted or flat design depending on your choice of architecture.
Finishing Touches on the Structure
To further stabilize your dollhouse, reinforce the corners with additional cardboard pieces. This step enhances durability. Make sure everything is securely attached before moving on to decoration. Checking for alignment will ensure your dollhouse looks professional.
Painting and Decorating Your Doll House
Decoration transforms a simple cardboard structure into a charming home. Begin by painting the walls of each room. Choose colors that reflect your chosen theme or create contrasting schemes. This stage allows for significant creative expression.
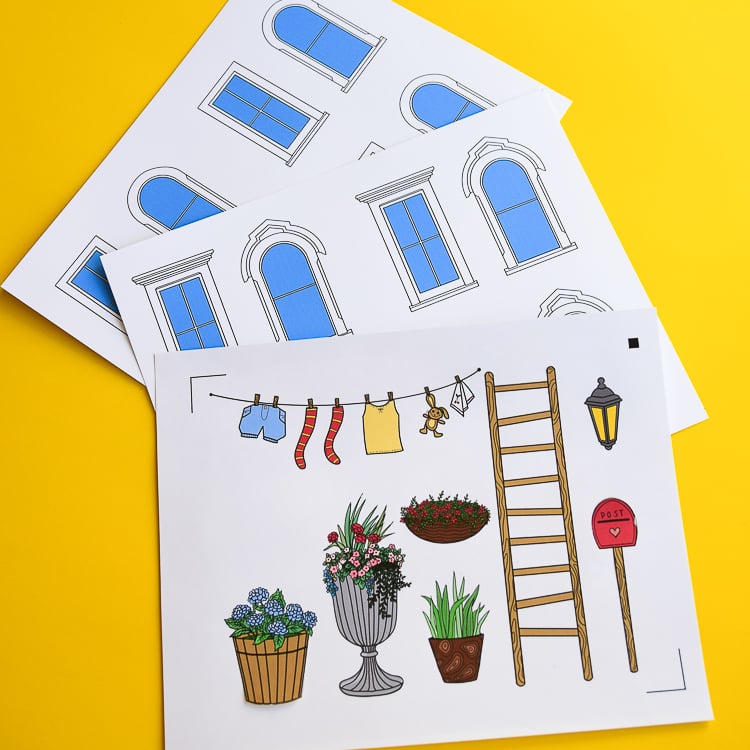
Adding Details
Once the paint dries, it’s time to add details. Use markers or paint for accents like borders or windowsills. If you have stickers, now is the time to apply them as well. Adding details provides a personal touch, making the dollhouse uniquely yours.
Furnishing Your Doll House
Furnishing your dollhouse is perhaps the most fun part of the project. You can either create furniture from paper or use small items you already own. Small boxes, buttons, or fabric scraps can transform into cozy furniture pieces. Ensuring each item fits well within the space adds to the homey feel.
Customizing Your Paper Doll House’s Theme
Your dollhouse can reflect a specific theme. Themes can range from a rustic cottage to a modern city apartment. Choosing a theme is an exciting aspect of the project. It adds depth and character to your creation, making it visually appealing.
Selecting a Color Palette
Begin by selecting a color palette that complements your theme. Choose colors for walls, furniture, and decorations that harmonize well. This coherence will create an inviting atmosphere in your dollhouse.
Choosing Decorative Elements
Further customization can include choosing curtains, carpets, and decorative accents. You can create these from fabric scraps, or purchase miniature items. This step ties the theme together, ensuring that every piece contributes to the overall aesthetic.
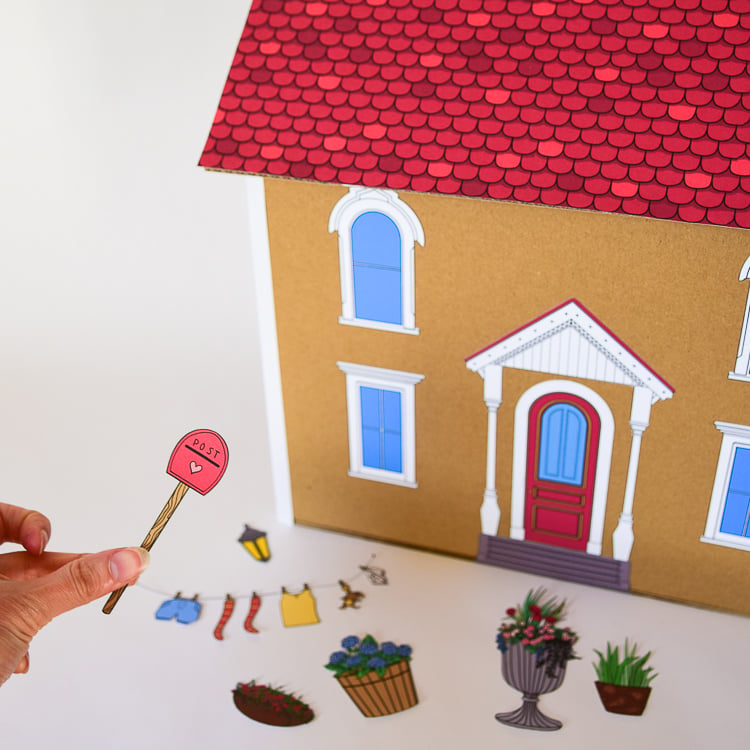
Enriching Your Project with Accessories
Accessories can elevate your dollhouse design and make it even more appealing. Small details enhance its charm and can provide endless hours of imaginative play. Consider items like miniature plants, books, or even tiny kitchen utensils. These elements enrich the storytelling aspects of your dollhouse.
Making Miniature Accessories
Creating your accessories can contribute significantly to the project. You can make picture frames from paper or cardboard. Be creative with materials; for example, bottle caps can be transformed into tables or chairs.
Using Found Objects
Alternatively, explore your house for small items. Old buttons, beads, or even small stones can serve a purpose. Integrating found objects makes the project unique while offering additional textural elements. This approach allows for creativity without requiring extra spending.
Showcasing Your Finished Paper Doll House
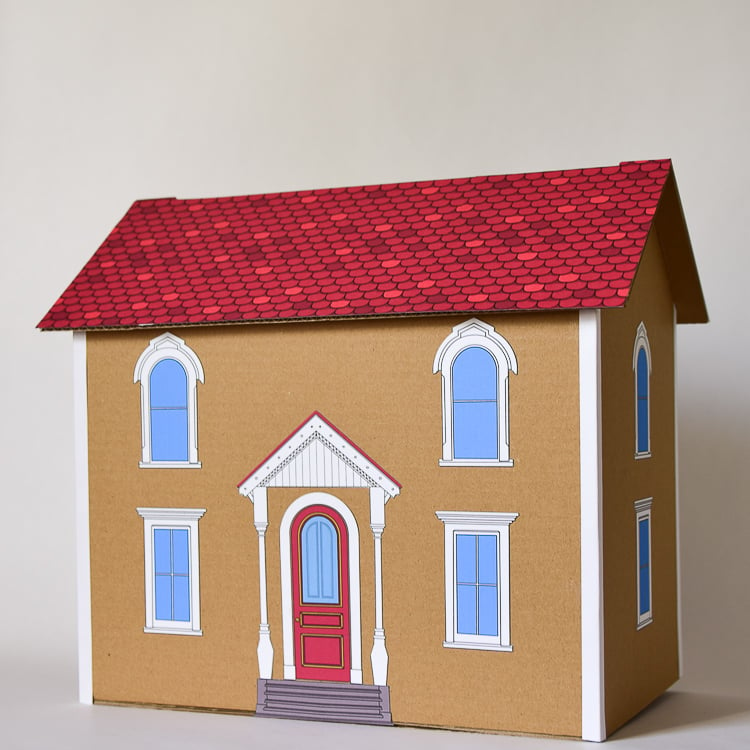
Once all elements are complete, it’s time to showcase your creation. This step not only celebrates your hard work but also invites others to admire your project. You can display your dollhouse on a shelf or table, highlighting its colorful details.
Taking Pictures
Consider taking pictures of your finished dollhouse from various angles. These photos will serve as a wonderful memento of your creative journey. Documenting the process can also inspire others to embark on similar projects.
Sharing Your Creation
Don’t hesitate to share your masterpiece with friends or on social media. Inspirations can be contagious, and sharing encourages others to tap into their creativity. Showcasing your project can foster community and discussions around crafting activities.
Engaging with Others and Community Projects
In addition to individual projects, consider engaging with community efforts. Group crafting sessions can yield dynamic results and foster social connections. It’s rewarding to collaborate with others on dollhouse creations.
Organizing Crafting Sessions
You can organize crafting sessions with friends or family. Sharing ideas and materials enhances the creative experience. Everyone’s different perspectives can add fresh elements to your project. Moreover, crafting together nurtures deeper relationships.
Contributing to Local Charities
Alternatively, consider donating your completed dollhouse to a local charity. Such contributions can have positive impacts on children. A handcrafted dollhouse can bring joy to those who do not have the means to create one themselves. Every dollhouse constructed represents a thoughtful gift.
Exploring More Paper Crafts
Creating a paper doll house opens doors to additional crafting opportunities. You will enjoy exploring various art forms related to paper crafts. From paper sculptures to origami, there’s endless potential for creativity.
Discovering New Techniques
As you build experience, look for new techniques and styles to evolve your craft. Online tutorials and workshops can expand your skills. Joining crafting groups or forums also provides inspiration and support.
Experimenting with Mixed Media
Don’t hesitate to experiment with mixed media. Combining materials like fabric, plastic, or wood can diversify your projects. This approach encourages problem-solving and innovation, allowing you to expand your crafting repertoire.
Conclusion: Your Turn to Create
Creating a paper doll house is more than just craft; it’s an avenue for personal expression. Throughout this guide, you’ve gathered the tools needed to embark on your journey. You’ve learned to design, build, paint, and decorate. This project can serve as a wonderful bonding experience for family and friends.
Your completed paper doll house is not just an object but a representation of your creativity. It stands as a testament to your hard work, dedication, and imagination. So gather your materials, unleash your creativity, and start constructing wonderful worlds today. Happy crafting!