Crafting a doll house from a cardboard box can be an exhilarating project. Not only is it budget-friendly, but it also spurs creativity. Children and adults alike can engage in this delightful endeavor. It offers an opportunity to share quality time with family. Furthermore, this art project helps develop fine motor skills and sparks imagination. How to make a doll house with a cardboard box easy?With a few simple supplies and a plan, you can create a unique dollhouse. In this article, we will explore easy steps to transform a cardboard box into a delightful doll house.
Gathering Materials to Begin
Before starting, gather all the materials needed for this project. Having everything on hand can enhance the crafting experience. You’ll require a large cardboard box, scissors, and some paint or colored paper. Additionally, you may need glue, tape, and decorative items. Small fabric scraps can also add charm to your dollhouse. Look around your home for items you can repurpose. For instance, buttons can become doorknobs, while fabric can serve as curtains. When all materials are ready, find a clean and spacious workspace. This setup will help you focus on the task ahead.
Selecting the Right Cardboard Box
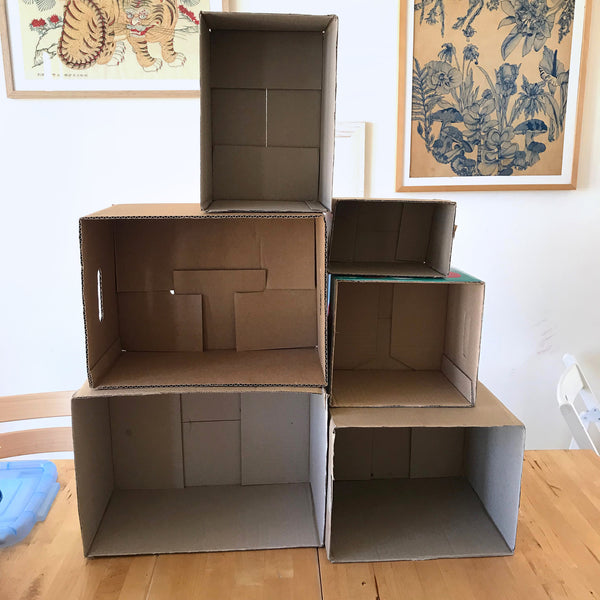
Choosing the right cardboard box is essential to your project’s success. Ideally, the box should be large enough to create multiple rooms. A bigger box allows for more creativity in layout design. You might find old shipping boxes, appliance boxes, or large delivery boxes. Remember, the sturdiness of the box matters. Select a box without tears or damage to ensure stability. Additionally, ensure that the box has flaps. These flaps can serve as walls or roofs, which adds versatility to your design.
Preparing the Box for Transformation
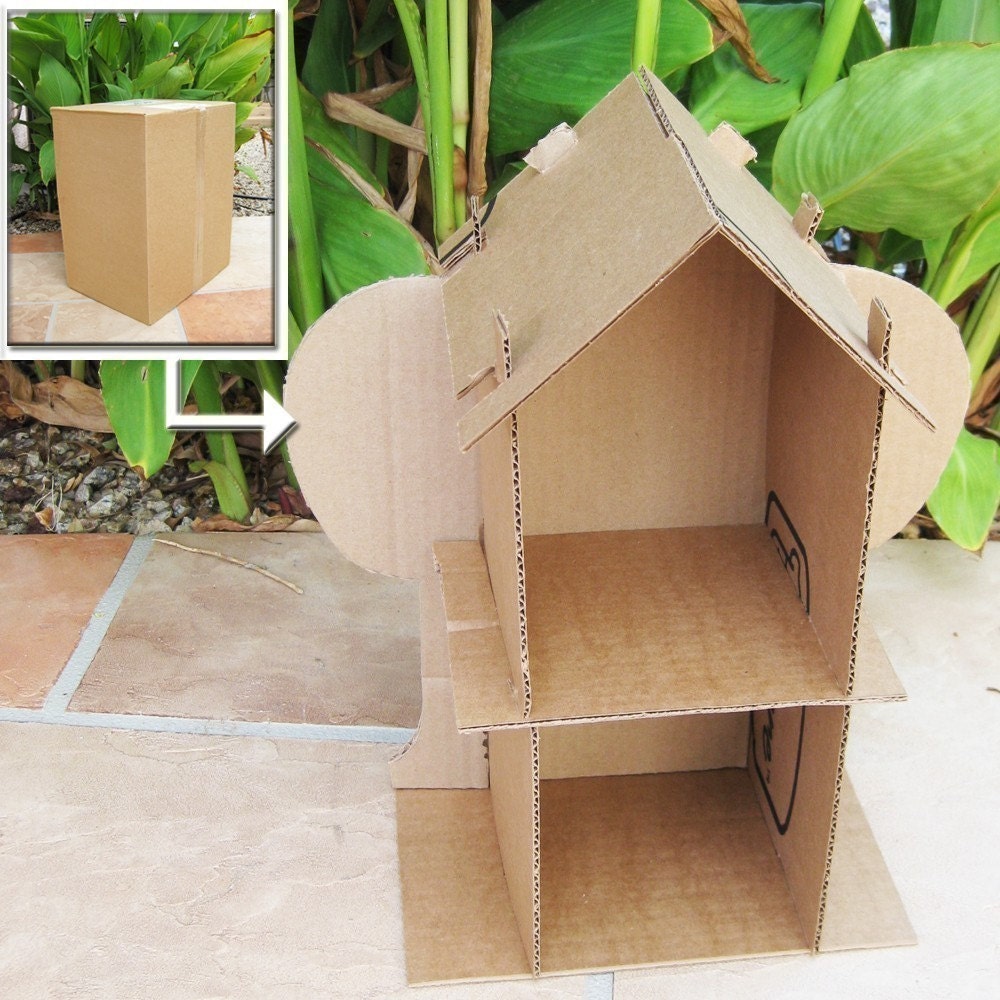
Once you’ve chosen your box, it’s time to prepare it. First, clean the box by removing any dust or residue. This step is crucial for painting or decorating later. After it’s clean, use a ruler and pencil to mark where you want the walls. Usually, dividing the box into four to six sections works well. Each section represents a different room in your dollhouse. After marking, carefully cut out the walls using scissors. However, remember to keep your fingers safe. If working with children, adult supervision is vital during this step.
Designing Your Dollhouse Layout
A thoughtful design can transform your empty box into a cozy home. Take time to envision how many rooms your dollhouse will have. Consider adding essential areas such as a living room, kitchen, and bedroom. These designs will enhance the play experience for children. Furthermore, think about how each room connects. This consideration will lead to a more logical flow within the dollhouse.
Sketching the Interior Design
Before diving into construction, sketching the interior layout helps crystallize ideas. Use a pencil and paper for a rough draft. You can illustrate where furniture will go and how each room will connect. Moreover, visualizing the space ensures that you maximize every inch of your box. Create a drawing that includes doorways and windows. This sketch can serve as a roadmap for building the dollhouse. Feel free to revise as necessary. Flexibility in planning allows for greater creativity.
Determining the Style and Theme
Next, decide on a theme for your dollhouse. Whether it’s a modern apartment or a cozy cottage, a theme guides your decorations. Consider the colors, furniture, and overall vibe you want to create. You may also choose a whimsical fairy tale style or a retro look. The theme adds cohesion and makes decorating more enjoyable. This choice can influence your color palette and decorative items. Ultimately, having a clear vision helps maintain focus throughout the crafting process.
Decorating the Dollhouse
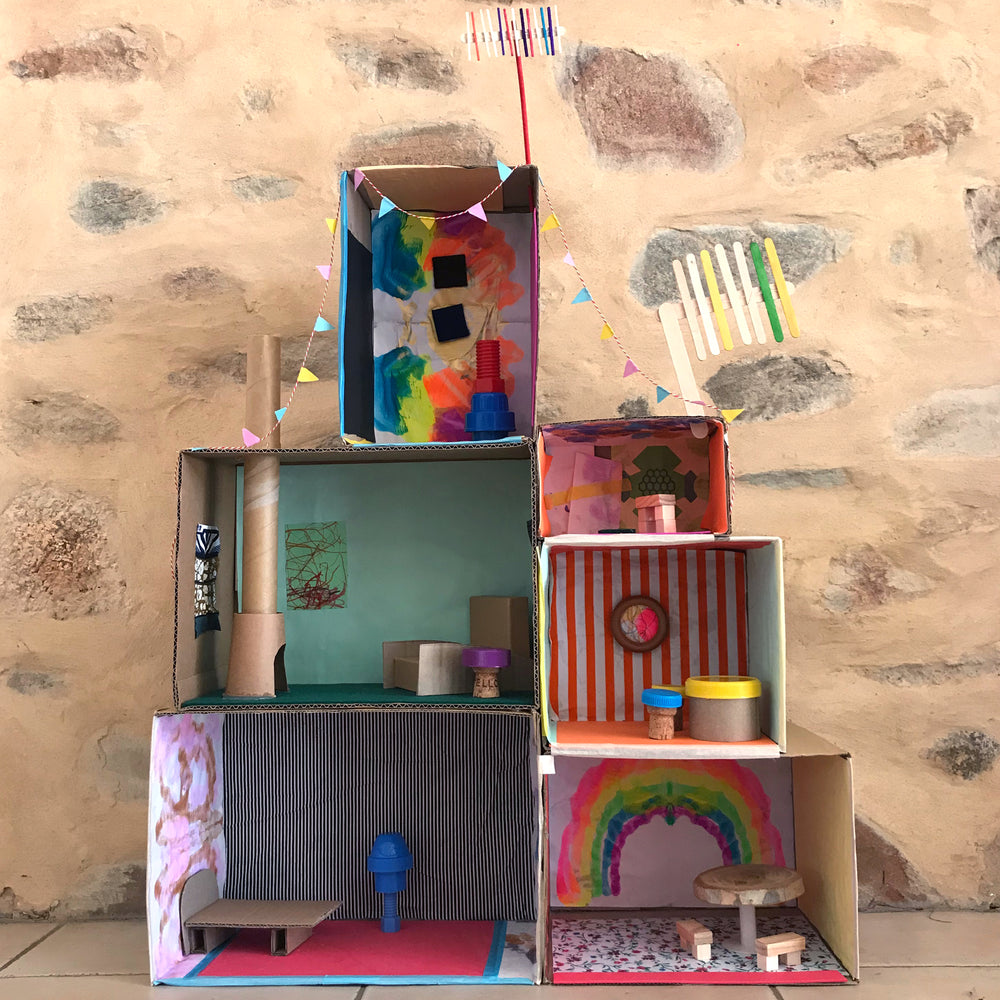
With a plan in place, it’s time to decorate your dollhouse. Selecting colors and materials can be the most thrilling part. Children often enjoy choosing vibrant colors, while adults might prefer subtle shades. Whatever your choice, paint or glue paper onto the walls of each room.
Painting the Walls
Painting is a straightforward way to personalize each space. Pick your favorite colors or designs for the walls. For an artistic touch, consider using sponges or brushes for texture. This technique can mimic features like wallpaper or decorative designs. Allow paint to dry completely before moving on to furniture placement. Children may also enjoy experimenting with colors. Letting them pick their favorites fosters a sense of ownership in the project.
Adding Furniture and Accessories
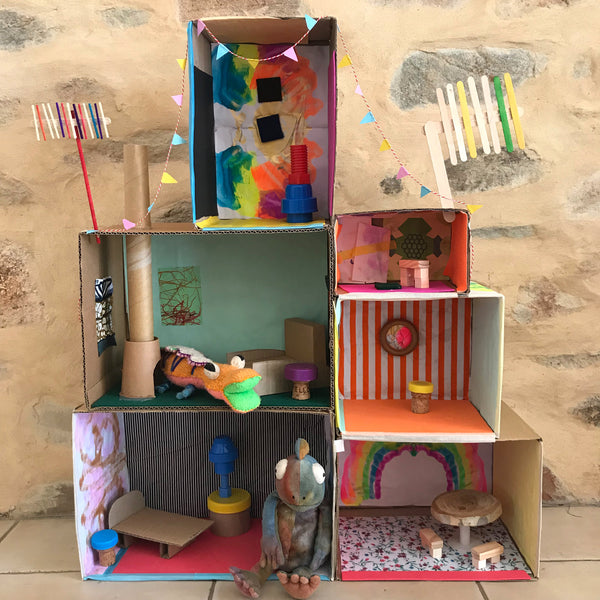
Once the walls are painted, it’s time for furniture and accessories. You can either purchase miniatures or craft your own from additional cardboard. Look around your home for small items that can serve as furniture. For instance, a small box can become a bed, while a bottle cap could serve as a table. Additionally, don’t forget about decorative items. Create rugs from fabric scraps or use old jewelry for decoration. Essentially, the more personalized, the better!
Adding Functionality to Each Room
Enhancing functionality in your dollhouse can elevate playtime experiences. Consider how each room is utilized and how it can mimic real life. By incorporating practical features, children can enjoy their play more fully.
Creating Working Doors and Windows
One of the most exciting aspects of building a dollhouse is creating functional doors and windows. Use smaller pieces of cardboard to create these elements. Cut out spaces for doors in between rooms and design small windows to allow light. You might even decide to make doors that open and close. Attach them using small strips of tape or a brad fastener for added movement. Moreover, creating these features encourages imaginative play, making the dollhouse feel more real.
Designing Unique Rooms with Purpose
Add distinct touches to each room based on its purpose. For example, a kitchen might include a cardboard stove made from small boxes. Utilize colored paper for appliances like refrigerators or ovens. In the living room, consider adding a mock fireplace. A cozy atmosphere can be created through detailed designs. Crafting specific items enhances engagement and deepens storylines. A unique touch also encourages storytelling during play.
Final Touches for Personalization
We are approaching the final steps in creating your dream dollhouse. These last touches are crucial for bringing your vision to life. Personalization is key; the final touches make it truly special.
Infusing Personal Details
At this point, consider adding personal details that resonate with your style. Family photos can be drawn or printed and then hung or placed throughout the dollhouse. Similarly, adding favorite quotes or little notes enhances the space. Creating a family tree with paper dolls or drawings can be a fun addition. These personal touches create a connection to those who will play with the dollhouse.
Ensuring Safety in Play
Finally, safety should always be a priority, especially with children involved. Smooth out any rough edges on cardboard to prevent cuts. Ensure that all decorations are secure to withstand playtime. Avoid small pieces that can become choking hazards. Testing the dollhouse by playing with it yourself also ensures it is sturdy. Remember, safety allows for endless imaginative play without worry.
Frequently Asked Questions
As you embark on this crafting adventure, you may have queries. Here are some frequently asked questions to guide you through the process.
How long does it take to make a dollhouse?
The time required to make a dollhouse varies based on complexity. However, most simple projects can be completed in less than a day. With multiple people working, the time may reduce. Enjoy the process; consider it a journey rather than a race.
Can children participate in making the dollhouse?
Absolutely! Engaging children in crafting can enhance their creativity. Assign them age-appropriate tasks and supervise with care. This approach not only teaches skills but also promotes teamwork.
Conclusion
Creating a doll house from a cardboard box is an enjoyable, rewarding process. By following the steps outlined, you can craft a unique and imaginative play area. With every layer of paint and little decoration, you build a world of creativity. It’s not just a project; it’s an experience that encourages bonding, learning, and fun. So gather your materials, ignite your imagination, and let the crafting commence!